A few weeks ago, I finally took the leap and dove head first into the world of home brewing. I wasn’t alone, and had ample support from a partner in crime and a few beer-savvy friends. However, I was sternly cautioned not to follow the directions on my convenient can of hopped malt extract (HME), as they can be misleading. In particular, they don’t tell you to rack your beer. Unless you want a chunk of yeast sediment at the bottom of each bottle, I highly recommend this step (more to come on this later).
The following description is not meant to give specific directions on how to brew your first batch, but an assurance that this process is more user-friendly than you might think. A dumbed-down guide for hesitant newcomers to the world of home brewing, if you will. Likewise, if your fist homemade beer sucks, there are plenty of people more knowledgeable than I on the internet that can help you troubleshoot a bad kit.
What you need:
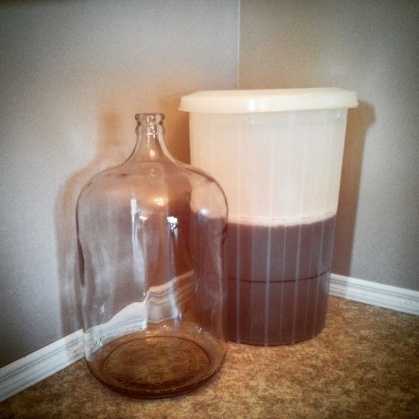
- Your Primary Fermentor (the big plastic bucket with a lid)
- The lid of said fermentor
- Your stirring stick
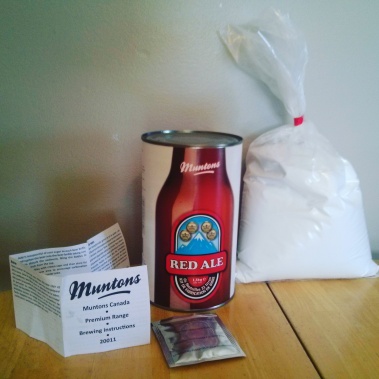
- 1kg of corn sugar (Dextrose)
- Your beer kit, which should include:
- Hopped Malt Extract (HME)
- Yeast
- The instructions that came with the HME (give these a cursory glance)
Where to begin?
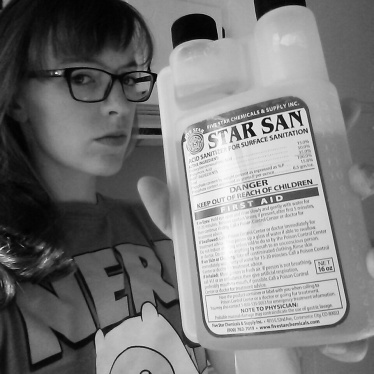
1. Sanitize, Sanitize, Sanitize
This part is extremely important to prevent nasty bacteria from getting it on in your brew – be sure to sanitize ALL of the above items. The most effective product to use for this would be an acid no-rinse variety such as Star San. This step didn’t take too long a time, since we only needed to sanitize a few items. And I had a lackey to assist with the heavy lifting. What did take a long time, was waiting for the primary fermenter to dry.
But seriously guys. Sanitize EVERYTHING.
2. Warm the malt extract
I did this by placing the can of HME in a large bowl and pouring some boiling water down the sides. This stuff is like molasses. And just like molasses, you need to trick this stuff into thinking it isn’t January (or, er…February, which is when we did this).
 3. Boil some water.
For my particular recipe, this was specifically 3.5L. In a relatively large pot. On your stove. Most municipal water is fine for extract brewing, though if you . Don’t be too picky with the volume either – it’s going to be diluted anyway.
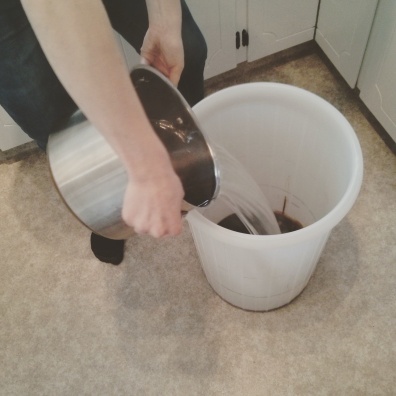
4. Mix it up.
Pour the HME into the dry, sanitized primary fermenter along with the boiling water and the corn sugar. And stir really, really well.
5. Add cold water
Add enough cold water to fill the fermentor to a volume of 23L (or 6 US Gallons). It’s a good idea to measure the volume you need ahead of time and draw a line on the bucket – lucky for me the actual owner of the brewing equipment had already done this for me.
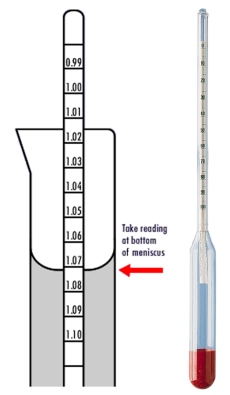
 This is also a good time to take a hydrometer reading. A hydrometer measures the specific gravity of a liquid, which gives an estimation of the sugar content of your beer. At the beginning, the specific gravity is usually between 1.040-1060, depending on the type of beer. As more sugar is turned into alcohol, the number will be lower. A typical range for specific gravity at the end of the brew is usually about 32 points lower at 1.004-1.016, though some styles may be higher (approximately 4.5%ABV).
The Homebrew Manual website has an excellent infographic indicating the ranges of specific gravity you would see for different styles of beer.
The easiest way to get a reading is to use a (sanitized!) turkey baster to extract about from your malty/sugary/water mixture and transfer it to a narrow plastic tube called a “trial jar.” Gently drop the hydrometer into the trial jar and measure the number at the bottom of the miniscus.*
*Break out your high school chemistry textbooks, folks. The meniscus is the curve in the upper surface of a liquid, which can easily distort volume measurements.
6. Add the yeast
Sprinkle the yeast over the top of the malt-and-water mixture. No need to mix!
7. Cover and Wait
 Put the (sanitized) lid of your fermentor back on, place it in a warm spot, and wait 5-6 days. During this time, be sure to take a few hydrometer readings to make sure the fermentation is taking place as scheduled.
Timing is everything in home brewing, so it’s a good idea to set aside time for each step. Five days is enough time for the yeast to chew up the delicious sugars in the malt and make some alcohol (the carbonation comes later).
And that was it for day one. Easier, than expected, don’t you think. Listen…if an incurable recipe-defying anarchist like me can do it, so can you.
References
- Love Brewing, UK. http://www.lovebrewing.co.uk/guides/wine-making/how-to-use-a-hydrometer/#.VteV0X0rKt8
- Homebrew Manual http://homebrewmanual.com/beer-gravity-chart/

How did the beer come out?
LikeLike
It was a good first try, but a bit “green” tasting for longer than I expected. We added a bit of oak too, which was a nice touch. Lots learned along the way though – I’d like to try another soon.
LikeLike